

Mastering the Pinning Tray: The 2026 Guide to Rekeying and Lock Organization
Last Tuesday, a trainee discovered that a single lost spring was all it took to turn a successful gutting into a three-hour search mission. You've likely felt that same frustration when a tiny driver pin pings off your desk and vanishes into the carpet. It's a heartbreaking moment that can stall your progress and turn a fun hobby into a stressful chore. If you want to move beyond "lucky picks" and truly master the craft, you need a reliable pinning tray for rekeying locks to act as your mechanical blueprint.
We've all been there, struggling with a cluttered workspace while trying to gut a complex lock for a belt ranking video. This guide will teach you how to use your tray to organize every pin and spring with precision, ensuring your rekeying projects are successful every time. We'll explore how to map internal mechanics to your workspace. Then, we'll show you how to build a professional-grade station that supports your journey from a white belt trainee to an expert-level picker.
Key Takeaways
- Discover why a pinning tray is the essential blueprint for every ethical lockpicker, preventing lost springs and chaotic workspaces during gutting.
- Learn how to select the perfect pinning tray for rekeying locks by comparing silicone and rigid materials designed for high-visibility organization.
- Master the step-by-step process of orienting your tray and using specialized tools like followers and shims to map internal mechanics safely.
- Elevate your locksport game by identifying security pin orientation and designing custom "challenge locks" for higher belt ranks.
- Build a professional-grade rekeying station with essential companion tools that mirror the progression of a serious hobbyist.
What is a Pinning Tray and Why Every Ethical Lockpicker Needs One?
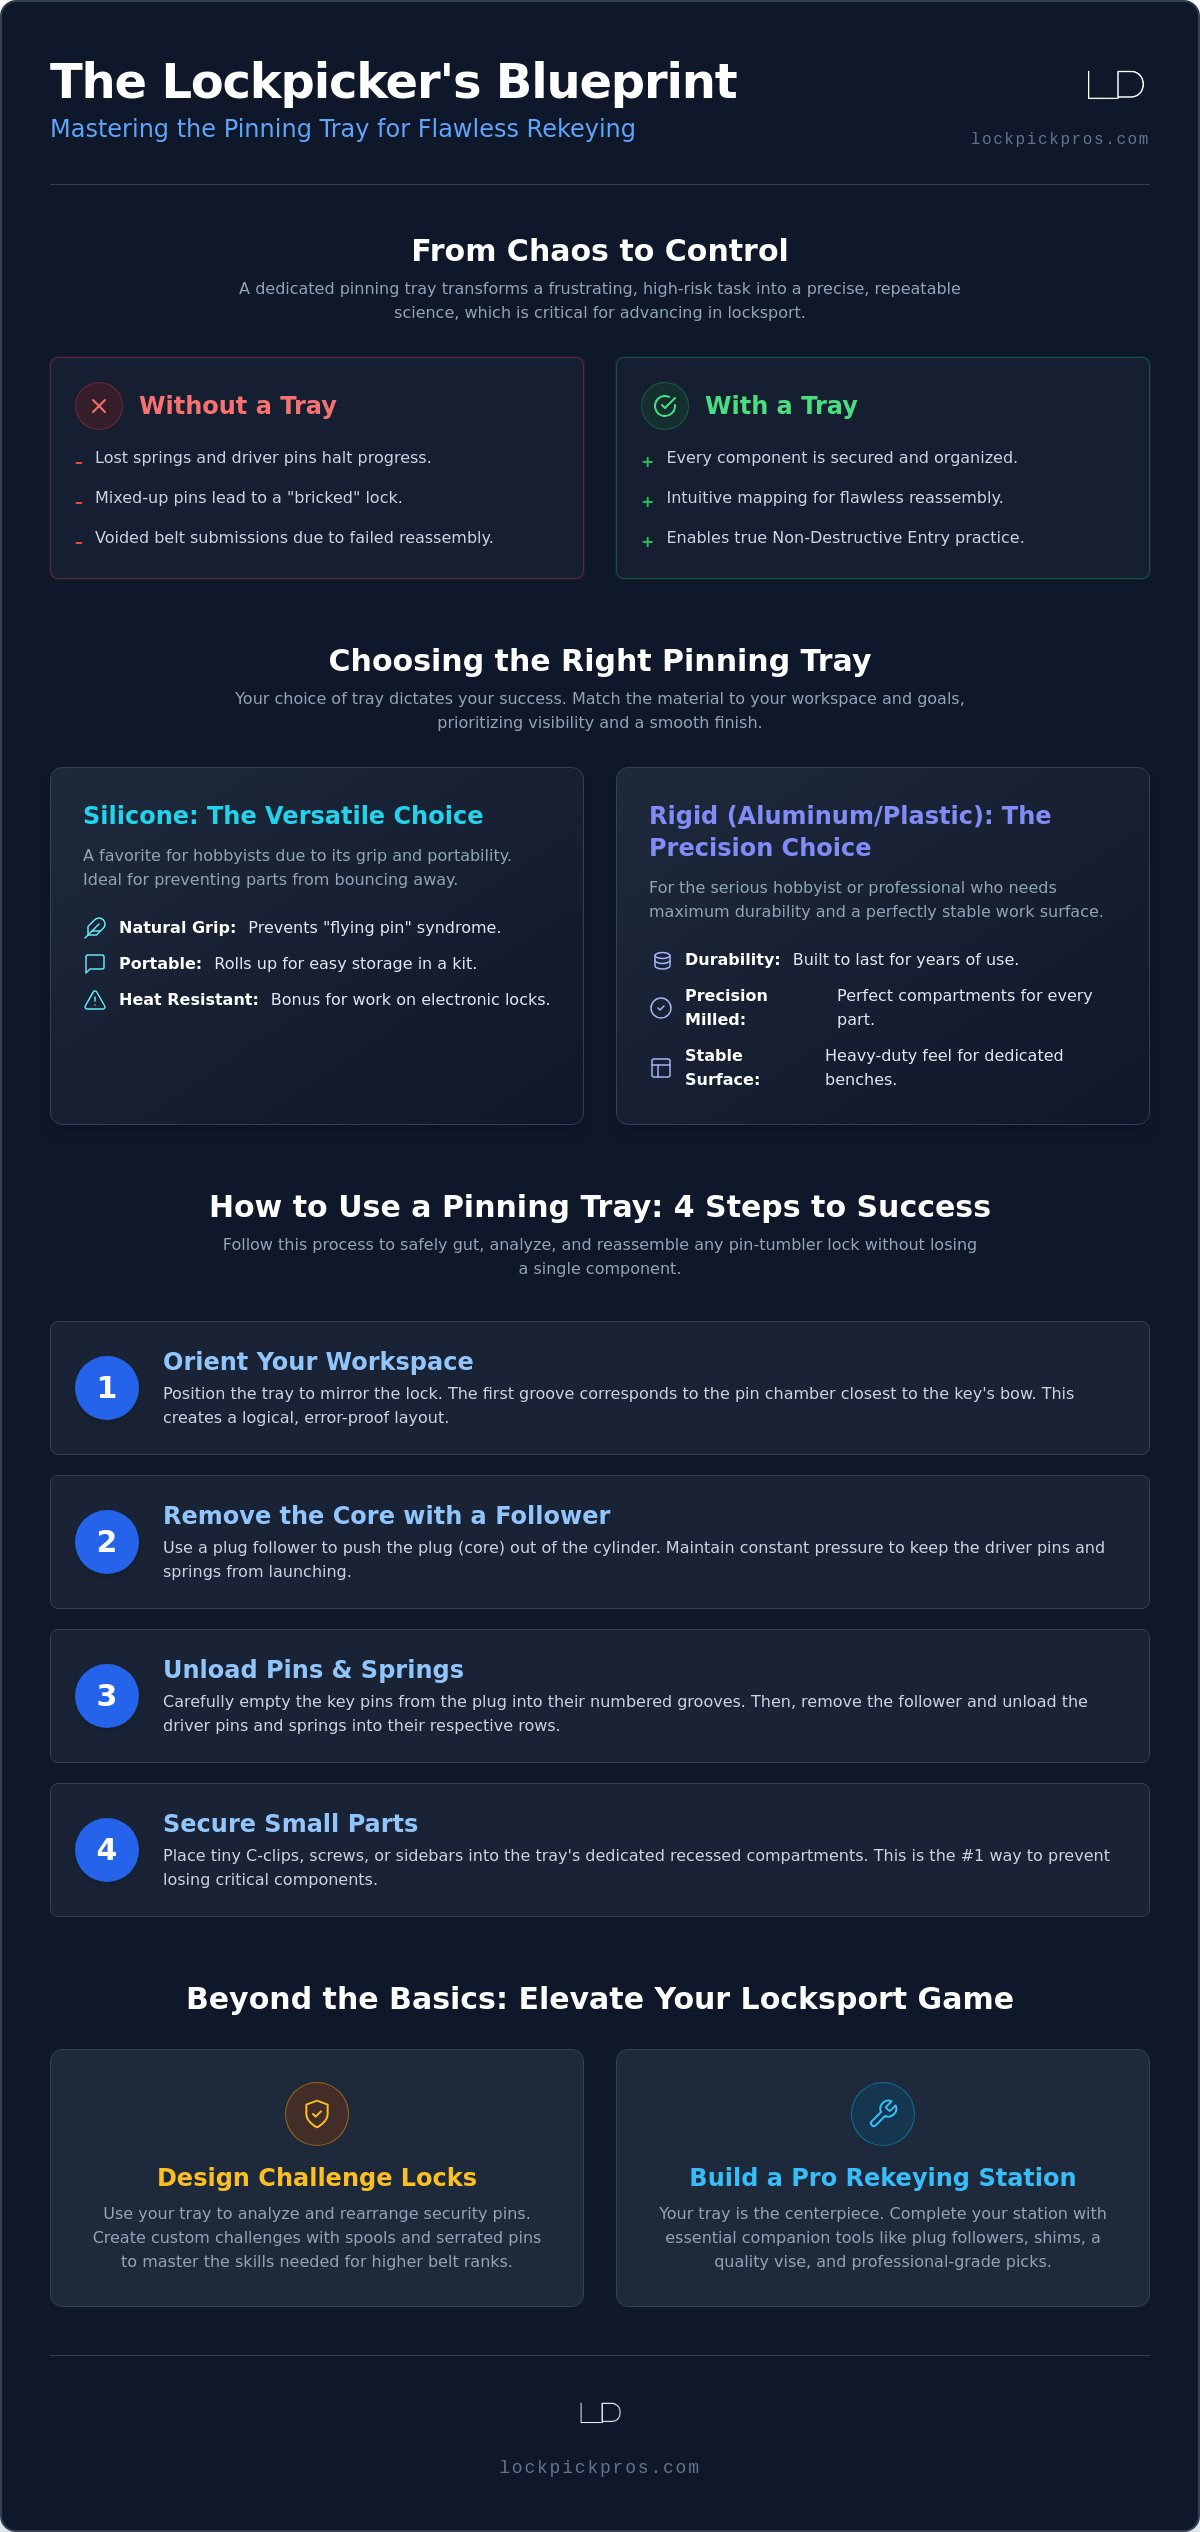
A pinning tray is a specialized organizational tool designed to hold the internal components of a lock in the exact order they were removed. While a generic rubber mat might keep things from rolling away, a dedicated pinning tray for rekeying locks provides specific channels that mirror the lock's internal geometry. For any ethical lockpicker, the tray is more than just a convenience. It's a statement of respect for the mechanical art. You aren't just trying to "defeat" a lock; you're trying to master it. Mastering the Pin tumbler lock requires you to understand exactly how each component interacts, and you can't do that if your pins are scattered across a messy desk.
In the world of locksport, gutting a lock is a rite of passage. As you climb the belt ranks, you'll find that many intermediate and advanced tiers require you to film a successful gutting and reassembly. If a single spring flies off into the void, your submission is void too. A tray ensures that your Non-Destructive Entry (NDE) practice remains truly non-destructive. It keeps you organized so you can focus on the technical challenge rather than hunting for lost parts on the floor.
The Anatomy of a Professional Pinning Tray
A high-quality tray is divided into specific zones that make reassembly intuitive. The core of the tray features numbered grooves. These are sized perfectly for key pins, driver pins, and springs. By placing these parts in order from the front of the lock to the back, you create a physical map of the bitting. Most professional trays also include a dedicated plug follower rest area. This keeps your follower secure so it doesn't roll off and dump the top pins. You'll also find small, recessed compartments. These are perfect for the tiny C-clips, screws, and sidebars that are often found in high-security cylinders.
From Trainee to Expert: Why Organization Matters
For those just starting out, using a set like The Trainee 2.0 is a great way to visualize how pins sit inside the plug. However, once you move to real metal locks, you lose that transparency. The tray becomes your "X-ray vision." It helps you avoid "bricking" a lock, which happens when a driver pin drops into an empty chamber because the order was wrong. Beyond just preventing mistakes, a pinning tray for rekeying locks helps you develop a mental map for Single Pin Picking (SPP). When you see exactly where a spool or serrated pin was located, you'll start to recognize the feedback those pins give while you're picking. It turns a guessing game into a calculated skill.
Choosing the Right Tray: Materials and Features for 2026
Choosing the right gear is about matching your workspace to your goals. When you are first learning how to rekey a lock, you quickly realize that your choice of surface dictates your success rate. A pinning tray for rekeying locks isn't a one-size-fits-all tool. You'll need to decide between the flexible grip of silicone and the heavy-duty precision of rigid metal or plastic. Each material offers distinct advantages depending on whether you're working at a dedicated bench or packing a kit for a local locksport meetup.
Visibility matters more than you might think. Tiny brass pins can easily disappear against a dark or cluttered background. Look for trays in high-visibility colors like bright blue, white, or safety orange to make those components pop. Some modern designs even feature magnetic sections. These are excellent for keeping steel springs from wandering off, but use them with caution. Magnetizing your pins can cause them to stick to your picks later, which creates a massive headache during a Single Pin Picking session. While 3D printed trays are a popular budget option in the community, they often have rough surface textures. These tiny ridges can trap springs or cause pins to sit at awkward angles, so always check for a smooth finish.
Silicone Mats: The Versatile Choice
Silicone is a favorite for hobbyists because it naturally grips the table. It prevents the dreaded "flying pin" syndrome where a dropped component bounces off a hard surface and vanishes. These mats are often heat resistant, which is a nice bonus if you occasionally perform minor soldering on electronic locks. They're also incredibly easy to clean. You can simply wash away old grease or metal shavings with soap and water. Because they're flexible, you can roll them up and tuck them into your gear bag without worrying about cracks or permanent bends.
Rigid Aluminum Trays: The Professional Standard
Rigid trays, particularly those milled from aluminum, represent the peak of organization. The precision-milled grooves are deeper and sharper than those found on silicone mats. This prevents pin roll-over, ensuring that your driver pins stay exactly where you put them even if the tray is bumped. The added weight is a significant advantage too. A heavy metal tray stays put during complex gutting procedures, providing a stable foundation for your work. If you're upgrading to a high-end setup, pairing a solid tray with professional tools like the Carbon Fiber Gen 2 Pro Series ensures every gutting session feels like a masterclass in precision. It's an investment that pays off every time you successfully reassemble a high-security cylinder without a single mistake.
Step-by-Step: How to Use a Pinning Tray for Rekeying Locks
Setting up your workspace is the first step toward a successful rekey. You need a flat surface, plenty of light, and your pinning tray for rekeying locks centered in front of you. Before you start, identify which side of the tray represents the front of the lock. Most pickers prefer to work from left to right. This orientation is vital. If you mix up the order, you'll end up with a lock that doesn't work with your new key. Grab your pinning tweezers and clear away any distractions. A clean station is the mark of a pro.
Once you're ready, remove the tailpiece or clip and use a plug follower to push the core out. This keeps the driver pins and springs trapped in the Bible so they don't fly everywhere. As the core slides out, transfer the key pins to the first row of your tray. Next, carefully remove each driver pin and spring from the Bible. Place them in the corresponding grooves behind the key pins. This creates a clear, vertical map of each chamber. Finally, place your new key into the core and drop the new pins in to verify the bitting. They should sit perfectly flush with the shear line before you even think about reassembly.
The Gutting Process: Avoiding the "Explosion"
A plug follower is a solid cylinder used to maintain tension on the driver pins while the lock core is removed. Following the front-to-back rule ensures that the first pin you remove goes into the first slot on your tray. This prevents the "explosion" of parts that happens when a core is pulled without support. For a deeper dive into these techniques, check out Lock Rekeying for Beginners: Mastering Internal Mechanics in 2026.
Tweezers and Tension: Precise Pin Placement
Standard tweezers are too flat for this technical work. Pinning tweezers feature a curved tip that matches the radius of the pins, giving you a secure grip. During the reloading phase, you'll push the driver pins back into the Bible against the spring tension. Be gentle with the springs. If you kink a spring while trying to force it into a chamber, the lock will feel crunchy or may not reset properly. Use a light touch and let the tools do the work. This level of precision is exactly what separates a hobbyist from a true locksport expert.
Advanced Organization for Security Pins and Green Belt Challenges
Once you reach the Green Belt level, the stakes get higher. You'll be dealing with locks like the American Lock 1100 or the Master Lock 410 LOTO. These aren't your standard residential cylinders. They are packed with serrated pins and spools designed to trick your senses. Your pinning tray for rekeying locks is the only way to keep these "evil" stacks organized. When you gut an 1100, you need to see exactly which chamber held the spool. This helps you understand why you hit that massive false set at pin three. If you're designing a challenge lock to send to a fellow picker, the tray is your drafting board. You can swap pin positions and test the feedback until you've created a truly difficult puzzle.
Verification is a huge part of the locksport community. To earn your higher belt ranks, you often need to provide a clear photo of the "pinned out" tray alongside the picked lock. This serves as proof that you've mastered the internal mechanics and didn't just get a lucky open. A high-contrast tray makes these photos look professional and easy for moderators to read. It shows you're an ethical lockpicker who takes the technical side of the sport seriously. Build your ultimate challenge lock setup with the Carbon Fiber Gen 2 Pro Series to ensure your tools match your growing expertise.
Mapping Spools, Serrated, and Mushroom Pins
Place your security pins in the grooves so you can see their orientation. For spools, check if one end is slightly more tapered; this can affect how easily it drops into a false set. If you're working with commercial cylinders, you might encounter master wafers. These tiny brass discs create multiple shear lines. Tracking them on your pinning tray for rekeying locks is essential to avoid "key ghosting," where a lock opens with keys it shouldn't. Understanding the physical layout of these pins correlates directly to the feedback you feel through your tension wrench. It turns the "click" you hear into a clear mental image of the pin stack.
The Black Belt Challenge: Share Your Setup
We believe in a "share-to-earn" community. Once you've pinned out a particularly nasty challenge lock, post a photo of your tray on social media. Tag us and use the community hashtags to earn rewards through our share-to-earn loop. We even offer a community bounty for hitting social reach goals with your "picks-in-action" content. It's a great way to show off your progress and help others learn. Ready to step up? Join the Black Belt Challenge for free and start your journey toward locksport mastery today!
Beyond the Tray: Building Your Professional Rekeying Station
Ethical lockpicking is as much about tool maintenance as it is about picking technique. A dirty pinning tray for rekeying locks can actually harm your progress. Metallic dust and old lubricant residue can gum up your pins or hide tiny defects in a spring. Part of being a responsible member of the locksport community is keeping your gear in peak condition. When your station is organized and your tools are clean, you can focus entirely on the mechanical puzzle. Your tray shouldn't just be a place to dump parts; it should be the center of a clean, professional workspace. For those who enjoy building and understanding complex systems, you can explore MC4.0 Controller to see how modular hardware platforms are used in technical STEM education.
Essential Specialty Tools for Advanced Tiers
As you move into high-security territory, standard tools won't always cut it. For dimple locks and complex cylinders, you might need the HUK 8-piece Kaba tools. These specialized picks and tensioners are designed for the tight tolerances of professional-grade locks. You should also keep shim stock on your bench. Shimming a lock is a lifesaver when you're worried about "bricking" a cylinder during the gutting process. It provides an extra layer of security, ensuring the driver pins stay where they belong until the follower is in place. Having these items ready at your station makes the transition to advanced locks much smoother.
Maintaining Your Gear for Long-Term Mastery
Keep your workspace efficient by cleaning your pinning mats regularly. A quick wipe with a microfiber cloth removes the grit that accumulates during practice. If you use a silicone mat, a bit of warm, soapy water will make it look brand new. Store your gear in a dedicated carrying case to keep your tools sharp and your springs from getting crushed. This level of care reflects your commitment to the sport. Keep pushing your boundaries, progress through the belt levels, and don't be afraid to upgrade your tools as you earn your stripes. Every new tier is a chance to refine your station and master another piece of the puzzle.
Level Up Your Locksport Station
You've seen how a dedicated workspace transforms a chaotic gutting session into a masterclass in precision. By using a pinning tray for rekeying locks, you ensure every tiny spring and security pin stays exactly where it belongs. This organization is the secret to mastering complex cylinders like the American Lock 1100 without the fear of "bricking" your favorite practice lock. Whether you're mapping out spool pins for a Green Belt submission or designing a custom challenge lock, your tray serves as the blueprint for your mechanical mastery.
Now it's time to put these skills into practice and climb the ranks. We provide precision tools for ethical lockpickers and community-vetted belt ranking gear to support your journey at every level. With a satisfaction guarantee on all pro-series tools, you can build your professional rekeying station with total confidence. It's about more than just opening locks; it's about understanding the soul of the machine.
Master the internal mechanics—Join the Black Belt Challenge for free!
Keep pushing those boundaries and sharing your progress with the community. We can't wait to see your next successful gutting video or "picks-in-action" post on social media!
Frequently Asked Questions
Can I use a 3D printed pinning tray for professional rekeying?
You can use a 3D printed tray, but you must be careful about the surface quality. Many community members print their own designs, but the layer lines can create rough ridges that trap tiny springs or snag delicate pins. If you choose this route, sand the grooves until they are perfectly smooth. For high-security work, a precision-milled aluminum or smooth silicone surface is usually safer to prevent mechanical errors.
Do I really need a pinning tray if I am only picking, not gutting locks?
You don't strictly need one for picking alone, but gutting is a vital skill for progressing through the belt ranks. Most intermediate and advanced tiers require you to film a full gut and reassembly to prove you didn't bypass the lock. Using a tray also helps you visualize the internal mechanics. It connects the physical feedback you feel in your tension wrench to the actual pin stacks inside the Bible.
What is the best way to clean a silicone pinning mat?
The best way to clean silicone is with warm, soapy water and a soft microfiber cloth. This material is non-porous and durable, so it handles grease and lubricant residue well. Avoid using harsh chemicals that could degrade the grip of the silicone. Always ensure the mat is completely dry before you start your next project. Any trapped moisture can cause brass pins or steel springs to corrode over time.
What should I do if I accidentally mix up the pins on my tray?
Don't panic; just grab the key for that cylinder. You'll need to manually test each key pin in the core one by one. Drop a pin into a chamber, insert the key, and check if it sits flush with the shear line. Repeat this for all chambers until the bitting is mapped out perfectly. It's a tedious process, but it's an excellent exercise for learning how to read bitting by sight alone.
Are pinning trays and rekeying kits legal to own for hobbyists?
Ownership is legal in most jurisdictions for ethical lockpickers who use them for hobbyist or sporting purposes on their own locks. We always encourage you to check your specific state or local laws, as some areas have stricter regulations regarding locksmithing tools. Our community focuses on the legal, non-destructive entry side of the sport. We advocate for responsible tool ownership and the strict following of the hobbyist code of ethics.
How do I organize security pins like spools on a standard tray?
Place your security pins in the driver pin grooves directly behind their corresponding key pins. Use the numbered slots on your tray to track exactly which chamber held the spool or serrated pin. This organization is crucial for troubleshooting. When you feel a false set at a specific point, you can look at your tray and identify exactly which security pin is causing that feedback in the lock.
What size pinning tray do I need for a standard 6-pin Schlage cylinder?
A standard pinning tray for rekeying locks with six or seven slots is perfect for Schlage or Kwikset cylinders. Most hobbyist trays are designed with at least six numbered grooves to accommodate common residential and commercial locks. Having a seventh slot is often helpful for storing extra components. It gives you a safe place for the C-clip or tailpiece screws while you work on the internal pin stacks.
Can I use a pinning tray for dimple locks or wafer locks?
Yes, a pinning tray for rekeying locks is versatile enough for almost any mechanical cylinder. For wafer locks, you'll use the grooves to keep the wafers in their specific sequence from front to back. For complex dimple locks, the tray is even more important. It helps you separate the inner and outer pins found in high-security systems. This prevents the confusion that often leads to a "bricked" lock during reassembly.